Chocolate cake Recipe
Chocolate cake Recipe
Chocolate cake Recipe Introduction:
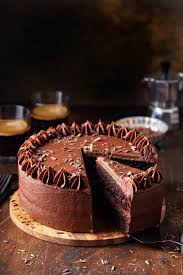
Chocolate cake is a beloved classic dessert renowned for its rich, moist texture and deep chocolate flavor. It’s a versatile treat that can be enjoyed in various forms, from a simple, unfrosted loaf to a decadent layer cake with layers of creamy frosting. Perfect for celebrations or as a comforting indulgence, chocolate cake appeals to chocolate lovers of all ages.
Chocolate cake Recipe Overview:
A rich, moist chocolate cake with a deep cocoa flavor, perfect for birthdays, celebrations, or as a delightful treat. This recipe yields a tender cake that can be enjoyed on its own or dressed up with frosting.
Chocolate cake Recipe Ingredients:
- 1 ¾ cups all-purpose flour
- 1 ½ cups granulated sugar
- ¾ cup unsweetened cocoa powder
- 1 ½ teaspoons baking powder
- 1 ½ teaspoons baking soda
- ½ teaspoon salt
- 2 large eggs
- 1 cup buttermilk (or milk with a splash of vinegar or lemon juice)
- ½ cup vegetable oil
- 2 teaspoons vanilla extract
- 1 cup boiling water
For the Frosting (optional):
- ½ cup unsalted butter, softened
- 2/3 cup unsweetened cocoa powder
- 3 cups powdered sugar
- 1/3 cup milk
- 1 teaspoon vanilla extract
Chocolate cake Recipe Ingredient Tips:
- All-Purpose Flour:
- Use the Right Measurement: Measure flour correctly by spooning it into the measuring cup and leveling it off to avoid adding too much flour, which can make the cake dense.
- Granulated Sugar:
- Sweetness Balance: Ensure you use the correct amount of sugar for the desired sweetness. Reducing sugar can affect texture and moisture.
- Unsweetened Cocoa Powder:
- Quality Matters: Use high-quality cocoa powder for a richer chocolate flavor. Dutch-processed cocoa powder gives a smoother, less acidic taste compared to natural cocoa powder.
- Baking Powder and Baking Soda:
- Leavening Agents: Baking powder and baking soda are crucial for the cake’s rise. Ensure they are fresh; old leavening agents can lead to a dense cake.
- Salt:
- Flavor Enhancer: A small amount of salt enhances the chocolate flavor and balances the sweetness. Don’t omit it.
- Eggs:
- Room Temperature: Use eggs at room temperature for better mixing and texture. Cold eggs can cause the batter to curdle.
- Buttermilk:
- Substitute Option: If you don’t have buttermilk, you can substitute with milk mixed with 1 tablespoon of vinegar or lemon juice. This helps to tenderize the cake and react with baking soda for leavening.
- Vegetable Oil:
- Moisture and Tenderness: Oil keeps the cake moist and tender. You can substitute with other neutral oils or even melted butter if preferred.
- Vanilla Extract:
- Pure vs. Imitation: Use pure vanilla extract for the best flavor. Imitation vanilla can be used, but it may lack depth.
- Boiling Water:
- Enhances Cocoa Flavor: Adding boiling water helps dissolve the cocoa powder, intensifying the chocolate flavor and improving the cake’s texture.
Frosting Tips:
- Unsalted Butter:
- Room Temperature: Ensure butter is softened to room temperature for easy mixing and smooth frosting.
- Powdered Sugar:
- Sift for Smoothness: Sift powdered sugar before adding it to the frosting to avoid lumps.
- Milk:
- Adjust Consistency: Add milk gradually to reach the desired frosting consistency. If the frosting is too thick, add a little more milk; if too thin, add more powdered sugar.
- Vanilla Extract:
- Enhances Flavor: Vanilla extract adds depth to the frosting. Adjust the amount based on taste preferences.
Chocolate cake Recipe Equipment Needed:
- ixing Bowls:
- Sizes: At least one large bowl for mixing the dry ingredients and another for the wet ingredients. A medium bowl may also be useful for combining frosting ingredients.
- Measuring Cups and Spoons:
- Dry Measuring Cups: For measuring flour, cocoa powder, and sugar.
- Liquid Measuring Cups: For measuring buttermilk and oil.
- Measuring Spoons: For baking powder, baking soda, salt, and vanilla extract.
- Electric Mixer:
- Hand Mixer or Stand Mixer: For beating the cake batter and making the frosting. A stand mixer can be more convenient if you’re making larger quantities or frequently bake.
- Sifter:
- Optional but Recommended: For sifting flour, cocoa powder, and powdered sugar to avoid lumps and ensure a smooth batter and frosting.
- Spatula:
- Rubber or Silicone Spatula: For scraping down the sides of mixing bowls and folding ingredients.
- Cake Pans:
- Round or Square: Typically 8-inch or 9-inch round pans, or an equivalent square pan. You can also use a bundt pan if you prefer.
- Parchment Paper:
- For Lining Pans: Helps prevent the cake from sticking and makes removal easier. Cut to fit the bottom of the pans.
- Cooling Racks:
- For Cooling: Allow cakes to cool evenly and prevent sogginess by placing them on wire racks.
- Toothpick or Cake Tester:
- To Check Doneness: Insert into the center of the cake to check if it comes out clean or with a few moist crumbs.
- Offset Spatula:
- For Frosting: Helps to spread frosting smoothly over the cake.
- Knife or Cake Leveler:
- To Level Cakes: If needed, to ensure an even surface for stacking layers.
- Cake Stand or Serving Plate:
- For Display: A cake stand can make it easier to frost and present the cake.
Optional Equipment:
- Food Processor:
- For Finely Grinding Ingredients: Useful if you need to process graham crackers or other ingredients for crusts or toppings.
- Decorating Tools:
- Piping Bags and Tips: For more intricate frosting designs and decorations.
Having these tools on hand will help streamline the process of baking and decorating your chocolate cake, ensuring a smooth and enjoyable baking experience.
Chocolate cake Recipe Bottom of Form Step-by-Step Instructions:
- Preheat Oven:
- Preheat your oven to 350°F (175°C). Grease and flour two 8-inch or 9-inch round cake pans, or line them with parchment paper.
- Prepare Dry Ingredients:
- In a large mixing bowl, whisk together:
- 1 ¾ cups all-purpose flour
- 1 ½ cups granulated sugar
- ¾ cup unsweetened cocoa powder
- 1 ½ teaspoons baking powder
- 1 ½ teaspoons baking soda
- ½ teaspoon salt
- Mix Wet Ingredients:
- In another bowl, beat together:
- 2 large eggs
- 1 cup buttermilk (or milk mixed with 1 tablespoon vinegar or lemon juice)
- ½ cup vegetable oil
- 2 teaspoons vanilla extract
- Combine Wet and Dry Ingredients:
- Gradually add the wet ingredients to the dry ingredients, mixing until just combined. The batter will be thick.
- Stir in 1 cup boiling water until the batter is smooth and thin. This step helps to enhance the chocolate flavor and ensure a moist cake.
- Pour Batter into Pans:
- Divide the batter evenly between the prepared cake pans.
- Bake the Cake:
- Bake in the preheated oven for 30-35 minutes, or until a toothpick inserted into the center comes out clean or with a few moist crumbs.
- Rotate the pans halfway through baking if your oven heats unevenly.
- Cool the Cake:
- Let the cakes cool in the pans for 10 minutes.
- Transfer the cakes to wire racks to cool completely before frosting.
- Prepare Frosting (Optional):
- In a medium bowl, beat together:
- ½ cup unsalted butter, softened
- 2/3 cup unsweetened cocoa powder
- 3 cups powdered sugar
- 1/3 cup milk
- 1 teaspoon vanilla extract
- Beat until smooth and spreadable, adjusting the consistency with more milk or powdered sugar if necessary.
- Frost the Cake:
- If needed, level the tops of the cakes with a knife or cake leveler.
- Place one cake layer on a cake stand or serving plate. Spread a layer of frosting on top.
- Place the second layer on top and frost the sides and top of the cake.
- Decorate with additional chocolate shavings, sprinkles, or fruit if desired.
- Serve:
- Slice and serve the cake at room temperature. Enjoy!
Tips and Tricks:
**1. Ingredient Quality:
- Use High-Quality Cocoa Powder: For the best chocolate flavor, opt for high-quality unsweetened cocoa powder. Dutch-processed cocoa can provide a smoother, less acidic taste.
- Fresh Leavening Agents: Ensure baking powder and baking soda are fresh to properly leaven the cake and achieve the desired rise.
**2. Measurement Accuracy:
- Measure Flour Correctly: Spoon flour into your measuring cup and level it off with a straight edge. Avoid scooping directly from the bag, as it can pack the flour and lead to a dry cake.
- Sift Dry Ingredients: Sift together flour, cocoa powder, baking powder, and baking soda to remove lumps and ensure even distribution.
**3. Mixing Tips:
- Don’t Overmix: When combining wet and dry ingredients, mix until just combined to avoid developing too much gluten, which can make the cake dense.
- Incorporate Boiling Water Carefully: Stir the boiling water in slowly to avoid splashing and to fully combine with the cocoa powder, enhancing flavor and moisture.
**4. Baking Tips:
- Preheat Oven: Always preheat your oven to ensure even baking. An oven thermometer can help verify your oven’s accuracy.
- Use the Right Pans: Use the recommended size and type of pans for the recipe. Light-colored pans are best as they prevent over-browning.
- Check for Doneness: Start checking the cake 5 minutes before the suggested baking time. Insert a toothpick into the center; it should come out clean or with a few moist crumbs.
**5. Cooling and Frosting:
- Cool Completely: Allow cakes to cool in the pans for about 10 minutes before transferring them to wire racks. Cool completely before frosting to prevent the frosting from melting.
- Level the Cake: Use a knife or cake leveler to trim the tops of the cakes if they have domed. This creates a flat surface for even frosting and stacking.
**6. Frosting Tips:
- Beat Butter Well: For a smooth and creamy frosting, beat butter until it’s light and fluffy before adding other ingredients.
- Sift Powdered Sugar: Sift powdered sugar to avoid lumps and achieve a smooth texture in the frosting.
- Adjust Consistency: If the frosting is too thick, add a small amount of milk. If it’s too thin, add more powdered sugar.
**7. Decorating Tips:
- Crumb Coat: Apply a thin layer of frosting over the entire cake to seal in crumbs. Chill for about 30 minutes before applying the final coat of frosting.
- Use an Offset Spatula: For smooth frosting application and even layers, use an offset spatula.
**8. Storage Tips:
- Store Properly: Keep the cake covered at room temperature for up to 3 days. For longer storage, refrigerate or freeze. If freezing, wrap tightly in plastic wrap and aluminum foil.
**9. Enhancing Flavor:
- Add Coffee: A small amount of brewed coffee or espresso can enhance the chocolate flavor without making the cake taste like coffee.
- Mix-Ins: Consider adding chocolate chips or chunks to the batter for extra chocolatey bites.
**10. Experiment and Customize:
- Flavor Variations: Experiment with different types of cocoa powder or add extracts like almond or mint for unique flavor twists.
- Different Frostings: Try various frostings like cream cheese frosting, ganache, or whipped cream to customize your cake.
Serving Suggestions:
**1. Classic Presentation:
- Plain Slice: Serve a simple slice of chocolate cake on its own, perhaps with a dusting of powdered sugar or cocoa powder on top.
- Add a Cherry or Berry: Top each slice with a maraschino cherry or a fresh berry for a pop of color and added flavor.
**2. With Whipped Cream:
- Fresh Whipped Cream: Dollop a generous amount of freshly whipped cream on the side of each slice for a light and airy contrast to the rich cake.
- Flavored Whipped Cream: Infuse whipped cream with flavors like vanilla or a hint of coffee for added depth.
**3. With Ice Cream:
- Vanilla Ice Cream: Serve a slice of cake with a scoop of vanilla ice cream for a classic pairing.
- Chocolate or Coffee Ice Cream: For extra chocolate indulgence, pair with chocolate ice cream, or try coffee ice cream for a sophisticated twist.
**4. With Fruit:
- Fresh Berries: Accompany the cake with fresh strawberries, raspberries, or blueberries. Their tartness complements the sweetness of the cake.
- Fruit Compote: Serve with a warm fruit compote or a spoonful of fruit preserves to add a touch of natural sweetness.
**5. With Ganache:
- Drizzle with Ganache: Pour a rich chocolate ganache over the top of the cake for an elegant and indulgent touch.
- Serve on the Side: Serve warm ganache or sauce on the side for guests to drizzle over their slice.
**6. With Nuts or Sprinkles:
- Chopped Nuts: Garnish with chopped nuts like pecans, walnuts, or almonds for added texture and a nutty flavor.
- Sprinkles: Add colorful sprinkles or chocolate shavings for a festive look.
**7. With Coffee or Tea:
- Pair with Coffee: Serve the cake with a cup of coffee or espresso for a delightful combination.
- Tea: A strong black tea or a flavored tea like chai can complement the richness of the chocolate cake.
**8. As a Layered Dessert:
- Cake Trifle: Layer pieces of chocolate cake with whipped cream and chocolate pudding in a glass for a visually appealing and delicious trifle.
**9. With Frosting and Toppings:
- Decorative Frosting: Pipe extra frosting decorations on top of the cake for a more elaborate presentation.
- Edible Decorations: Use edible flowers, gold leaf, or candy decorations for special occasions.
**10. For Special Occasions:
- Birthday Cake: Add candles and festive decorations for birthdays.
- Holiday Dessert: Decorate with themed toppings or colors to fit the season or holiday.
These serving suggestions can enhance your chocolate cake experience and make it suitable for any occasion or preference.
Top of Form
Bottom of Form
FAQs:
**1. Can I use a different type of cocoa powder?
- Answer: Yes, you can use Dutch-processed cocoa powder instead of natural cocoa powder. Just be aware that Dutch-processed cocoa is less acidic and can affect the flavor and color slightly. If using Dutch-processed cocoa, ensure you have an adequate leavening agent, as it doesn’t react with baking soda as well as natural cocoa.
**2. What can I substitute for buttermilk?
- Answer: You can substitute buttermilk with regular milk mixed with 1 tablespoon of vinegar or lemon juice. Let it sit for about 5 minutes before using. For a thicker substitute, use plain yogurt or sour cream.
**3. How do I know when my cake is done baking?
- Answer: Insert a toothpick or cake tester into the center of the cake. If it comes out clean or with a few moist crumbs, the cake is done. If it comes out wet with batter, the cake needs more time.
**4. Can I use a different pan size?
- Answer: Yes, but you will need to adjust the baking time. For a different pan size, check the cake frequently towards the end of the baking time. For instance, if using a 9×13-inch pan, the cake will bake faster and may be ready in 25-30 minutes.
**5. How can I prevent my cake from sticking to the pan?
- Answer: Grease and flour the pans before pouring in the batter. You can also use parchment paper to line the bottom of the pans. To ensure easy removal, let the cake cool in the pan for about 10 minutes before transferring it to a wire rack.

