Crunchy Chicken Taco Recipe
Crunchy Chicken Taco Recipe
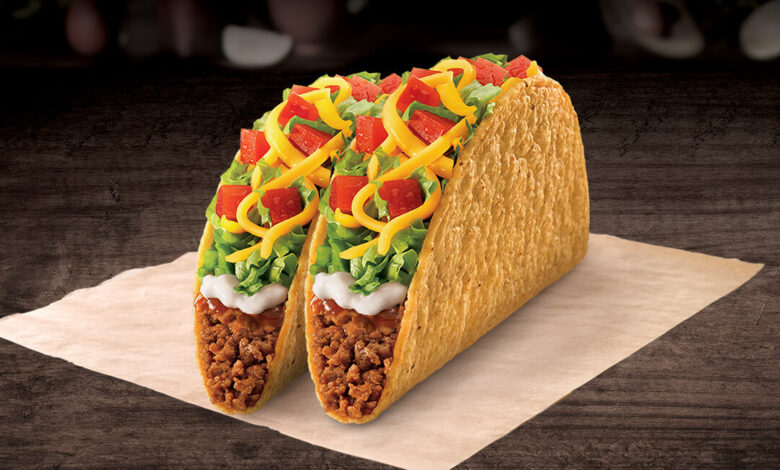
Crunchy Chicken taco Recipe Introduction:
Crunchy Chicken Tacos are a delicious and satisfying twist on the traditional taco. Featuring crispy, seasoned chicken coated in a crunchy breading, these tacos offer a delightful contrast of textures with every bite. The juicy and flavorful chicken is combined with fresh, vibrant toppings and served in a crispy taco shell, making it a crowd-pleasing dish that’s perfect for both casual family dinners and festive gatherings.
Crunchy Chicken taco Recipe Overview:
This recipe highlights the crispy texture of the chicken, enhanced by a blend of spices and a crunchy coating. Paired with crisp lettuce, tangy salsa, creamy avocado, and a sprinkle of cheese, the tacos offer a balanced flavor profile that’s both savory and satisfying. The crunchy chicken adds a fun, textural element that elevates the classic taco experience.
Crunchy Chicken taco Recipe Ingredients:
For the Crunchy Chicken:
- Chicken Breasts or Thighs – 1 lb (450g), cut into bite-sized pieces
- Description: Provides a juicy and tender base for the crunchy coating.
- Buttermilk – 1 cup (240 ml)
- Description: Helps to tenderize the chicken and provides a moist base for the breading to adhere.
- All-Purpose Flour – 1 cup (120 g)
- Description: Creates the initial coating for the chicken.
- Cornstarch – 1/4 cup (30 g)
- Description: Adds extra crispiness to the breading.
- Eggs – 2 large
- Description: Acts as a binding agent for the breading.
- Panko Breadcrumbs – 1 1/2 cups (90 g)
- Description: Provides a light, crispy texture to the coating.
- Paprika – 1 teaspoon
- Description: Adds a mild, smoky flavor.
- Garlic Powder – 1 teaspoon
- Description: Enhances the overall flavor of the chicken.
- Onion Powder – 1 teaspoon
- Description: Adds a savory depth to the breading.
- Ground Cumin – 1/2 teaspoon
- Description: Adds a warm, earthy flavor.
- Salt – 1 teaspoon
- Description: Enhances the flavors and seasonings.
- Black Pepper – 1/2 teaspoon
- Description: Adds a touch of heat and seasoning.
- Vegetable Oil – For frying
- Description: Used for frying the chicken pieces to achieve a crispy texture.
For Assembling the Tacos:
- Taco Shells – 8 small, crispy taco shells
- Description: The base for holding the chicken and toppings.
- Shredded Lettuce – 2 cups
- Description: Adds crunch and freshness to the tacos.
- Diced Tomatoes – 1 cup
- Description: Provides a juicy, tangy element.
- Sliced Avocado – 1
- Description: Adds creaminess and a rich flavor.
- Shredded Cheese – 1 cup (cheddar, Monterey Jack, or your choice)
- Description: Adds a cheesy, melty element.
- Sour Cream – 1/2 cup
- Description: Adds creaminess and a tangy contrast.
- Salsa or Pico de Gallo – 1/2 cup
- Description: Adds flavor and a touch of spiciness.
- Fresh Cilantro – A handful, chopped (optional)
- Description: Adds a fresh, herbal note.
- Lime Wedges – For garnish
- Description: Provides a zesty squeeze of lime juice to enhance the flavors.
These ingredients combine to create a flavorful and satisfying crunchy chicken taco, with a crispy coating and fresh, vibrant toppings that complement each other perfectly.
Crunchy Chicken taco Recipe Ingredient Tips:
- Chicken:
- Cut Size: Cut the chicken into uniform bite-sized pieces to ensure even cooking and consistent crunchiness.
- Substitutes: Chicken thighs can be used for a juicier, more flavorful option compared to breasts. Ensure any substitute is cooked to an internal temperature of 165°F (74°C).
- Buttermilk:
- Homemade Buttermilk: If you don’t have buttermilk, you can make a substitute by adding 1 tablespoon of lemon juice or white vinegar to 1 cup of milk. Let it sit for 5 minutes before using.
- Tenderizing: Buttermilk helps tenderize the chicken and allows the breading to stick better. Marinate the chicken in buttermilk for at least 30 minutes or overnight for best results.
- Flour and Cornstarch:
- Cornstarch Addition: Adding cornstarch to the flour mix enhances the crispiness of the coating. Don’t skip this step for the best texture.
- Seasoning: Season the flour and cornstarch mixture with additional spices if desired to enhance flavor.
- Panko Breadcrumbs:
- Texture: Panko breadcrumbs provide a light, airy crunch. Avoid using regular breadcrumbs as they are denser and won’t give the same crispy result.
- Seasoning: You can mix some of the spices used for the chicken into the panko for extra flavor.
- Eggs:
- Binding: Ensure the chicken pieces are fully coated in the egg mixture before dredging in the flour mixture. This ensures the breading adheres properly.
- Seasoning: Season the egg mixture with a pinch of salt and pepper to enhance the overall flavor.
- Spices and Seasonings:
- Adjust to Taste: Adjust the amount of paprika, garlic powder, onion powder, and cumin according to your flavor preferences. You can add other spices like chili powder or dried oregano for additional flavor.
- Fresh Herbs: Add finely chopped fresh herbs like cilantro or parsley to the spice mix for a fresh flavor twist.
- Oil for Frying:
- Temperature: Heat the oil to 350°F (175°C) for the best frying results. Use a thermometer to maintain the correct temperature and avoid greasy chicken.
- Type of Oil: Use oils with a high smoke point, such as vegetable oil, canola oil, or peanut oil.
- Taco Shells:
- Crisping: If using store-bought taco shells, warm them in the oven according to the package instructions for a crisper texture.
- Soft Tacos: For a variation, use soft flour or corn tortillas, and lightly toast them in a pan or oven.
- Toppings:
- Freshness: Use fresh, crisp lettuce and ripe tomatoes for the best texture and flavor.
- Creaminess: Adjust the amount of sour cream and cheese according to your taste preference. Greek yogurt can be used as a lighter alternative to sour cream.
- Avocado: Use ripe avocados for easy slicing. Add a squeeze of lime juice to prevent browning and enhance flavor.
- Garnishes:
- Cilantro: Chop cilantro just before serving to keep it fresh and vibrant.
- Lime Wedges: Serve lime wedges on the side to allow everyone to add a zesty squeeze to their tacos.
Crunchy Chicken taco Recipe Equipment Needed:
**1. Cutting Board and Knife:
- Purpose: To cut the chicken into bite-sized pieces and prepare vegetables and garnishes.
- Tip: Use a separate cutting board for raw chicken to avoid cross-contamination.
**2. Mixing Bowls:
- Purpose: To marinate the chicken in buttermilk and to prepare the flour, cornstarch, and panko breadcrumb mixtures.
- Tip: Use large bowls to easily coat the chicken pieces without making a mess.
**3. Whisk or Fork:
- Purpose: To whisk the eggs and mix them well with the seasoning.
- Alternative: A fork can be used if a whisk is not available.
**4. Measuring Cups and Spoons:
- Purpose: To measure out ingredients such as flour, cornstarch, spices, and oil.
- Tip: Use measuring spoons for precise spice measurements to ensure the right flavor balance.
**5. Large Plate or Shallow Dish:
- Purpose: To dredge the chicken pieces in the flour mixture.
- Tip: A shallow dish helps in evenly coating the chicken pieces.
**6. Frying Pan or Deep Fryer:
- Purpose: To fry the chicken pieces to achieve a crispy texture.
- Tip: If using a frying pan, ensure it’s deep enough to allow the chicken to be submerged in oil.
**7. Cooking Thermometer:
- Purpose: To monitor the oil temperature and ensure it reaches 350°F (175°C) for optimal frying.
- Tip: A cooking thermometer helps avoid undercooked or greasy chicken.
**8. Tongs or Slotted Spoon:
- Purpose: To safely place the chicken into the hot oil and remove it once cooked.
- Tip: Use a slotted spoon or tongs to drain excess oil from the chicken.
**9. Paper Towels:
- Purpose: To drain excess oil from the fried chicken and to keep it crispy.
- Tip: Place paper towels on a plate or tray to absorb the oil after frying.
**10. Taco Shells or Tortilla Warmer:
- Purpose: To warm and crisp up the taco shells or tortillas.
- Tip: If using soft tortillas, a tortilla warmer or a dry skillet can be used to heat them.
**11. Serving Platters or Plates:
- Purpose: To serve the assembled tacos.
- Tip: Use large platters to arrange tacos attractively and make serving easier.
**12. Small Bowls for Toppings:
- Purpose: To serve and organize toppings like shredded lettuce, diced tomatoes, and avocado slices.
- Tip: Label or organize toppings in separate bowls to allow for easy customization.
**13. Spoon or Spatula:
- Purpose: To mix and handle the breading mixture and to assemble the tacos.
- Tip: A spatula is useful for transferring the coated chicken into the hot oil.
**14. Brush (Optional):
- Purpose: To lightly coat the chicken with oil before frying if desired.
- Tip: This can help achieve an even crispier coating.
With these pieces of equipment, you’ll be well-prepared to create perfectly crispy and flavorful Crunchy Chicken Tacos.
Step-by-Step Instructions:
- Prepare the Chicken:
- Step 1: In a mixing bowl, combine the chicken pieces with buttermilk. Cover and refrigerate for at least 30 minutes, or up to overnight for better flavor and tenderness.
- Prepare the Breading:
- Step 2: In a shallow dish or large plate, combine the flour, cornstarch, paprika, garlic powder, onion powder, ground cumin, salt, and black pepper.
- Step 3: In another shallow dish, beat the eggs until well combined.
- Step 4: Place the panko breadcrumbs in a third shallow dish.
- Bread the Chicken:
- Step 4: Remove the chicken pieces from the buttermilk, allowing excess to drip off.
- Step 5: Dredge each piece of chicken in the flour mixture, coating evenly.
- Step 6: Dip the floured chicken into the beaten eggs, ensuring it is fully coated.
- Step 7: Finally, coat the chicken in the panko breadcrumbs, pressing gently to adhere the crumbs.
- Fry the Chicken:
- Step 8: Heat about 1 to 2 inches of vegetable oil in a frying pan or deep fryer to 350°F (175°C).
- Step 9: Fry the chicken in batches to avoid overcrowding, cooking until golden brown and crispy, about 3-4 minutes per side.
- Step 10: Use a slotted spoon or tongs to remove the chicken and drain on paper towels.
- Warm the Taco Shells:
- Step 11: While the chicken is frying, warm the taco shells according to the package instructions, or in a dry skillet over medium heat until crispy.
- Assemble the Tacos:
- Step 12: Place a layer of shredded lettuce in each taco shell.
- Step 13: Add a few pieces of crispy chicken on top of the lettuce.
- Step 14: Garnish with diced tomatoes, avocado slices, and shredded cheese.
- Step 15: Top with a dollop of sour cream and a spoonful of salsa or pico de gallo.
- Step 16: Sprinkle with chopped fresh cilantro if desired, and serve with lime wedges on the side.
- Serve:
- Step 17: Arrange the assembled tacos on a platter and serve immediately while the chicken is still crispy.
Tips:
- Keep Warm: If preparing in batches, keep cooked chicken warm in a low oven (about 200°F or 93°C) while frying the rest.
- Garnishes: Customize the toppings according to your preferences or add extras like pickled jalapeños or hot sauce for extra flavor.
- Side Dishes: Serve with sides like Mexican rice, refried beans, or a fresh salad for a complete meal.
Enjoy your Crunchy Chicken Tacos with their perfect blend of crispy chicken and fresh toppings!
Tips and Tricks:
**1. Chicken Preparation:
- Even Bites: Cut the chicken into uniform bite-sized pieces to ensure even cooking and consistent crunchiness.
- Marinate Time: Marinate the chicken in buttermilk for at least 30 minutes to help tenderize and flavor the chicken. For the best results, marinate overnight.
**2. Breading Process:
- Drying: After removing the chicken from the buttermilk, let it drain for a minute to avoid excess liquid, which can cause the breading to become soggy.
- Coating: Ensure each piece of chicken is thoroughly coated with flour, then dipped in egg, and finally coated with panko breadcrumbs. Press the breadcrumbs gently to ensure they stick well.
**3. Oil Temperature:
- Monitor Temperature: Use a cooking thermometer to keep the oil at a consistent temperature of 350°F (175°C). If the oil is too hot, the chicken will cook too quickly and might burn; if too cool, the chicken will absorb excess oil and become greasy.
- Fry in Batches: Fry the chicken in small batches to avoid lowering the oil temperature, which can result in soggy breading.
**4. Oil Type:
- High Smoke Point: Use oils with a high smoke point such as vegetable oil, canola oil, or peanut oil to ensure a crispy coating and avoid burning.
**5. Taco Shells:
- Warm Thoroughly: If using store-bought taco shells, warm them in the oven according to package instructions to make them extra crispy. Alternatively, lightly toast soft tortillas in a dry skillet for added texture.
- Avoid Overfilling: Be mindful not to overfill the taco shells, as this can cause them to break or become difficult to eat.
**6. Toppings and Garnishes:
- Freshness: Use fresh, crisp vegetables and garnishes to enhance the flavor and texture of the tacos. Rinse and dry lettuce thoroughly to keep it crisp.
- Customizable: Feel free to add or substitute toppings based on your preferences, such as pickled jalapeños, sliced radishes, or a squeeze of lime juice.
**7. Serving:
- Serve Immediately: Assemble and serve the tacos as soon as possible to ensure the chicken remains crispy. If preparing ahead of time, keep the fried chicken warm in a low oven and add toppings just before serving.
- Garnish: Add fresh herbs like cilantro and lime wedges to each taco for a burst of flavor and visual appeal.
**8. Healthier Options:
- Oven-Baked Version: For a lighter version, consider baking the breaded chicken instead of frying. Preheat the oven to 400°F (200°C) and bake the chicken on a wire rack set over a baking sheet for about 20-25 minutes, or until golden brown and crispy.
- Low-Fat Alternatives: Use Greek yogurt instead of sour cream for a lighter topping option.
**9. Cleanup:
- Prevent Oil Splatter: Use a splatter guard over the frying pan to minimize oil splatter and keep your cooking area clean.
- Drain Oil: After frying, carefully dispose of used oil or store it for future use. Let the oil cool before transferring to a container.
**10. Customize the Spice Level:
- Adjust Spices: Modify the amount of paprika, garlic powder, and other spices to match your preferred level of heat and flavor. Add a pinch of cayenne pepper to increase spiciness if desired.
Serving Suggestions:
**1. Classic Accompaniments:
- Mexican Rice: Serve with a side of Mexican rice, which complements the crunchy chicken with its savory flavor.
- Refried Beans: A side of refried beans adds a creamy texture and a hearty element to your meal.
**2. Fresh Sides:
- Guacamole: A rich and creamy guacamole pairs perfectly with the crunchy chicken tacos, adding a fresh and flavorful element.
- Corn on the Cob: Serve grilled or boiled corn on the cob with a sprinkle of chili powder and lime juice for a tasty side.
**3. Salads:
- Pico de Gallo: A fresh pico de gallo made with tomatoes, onions, cilantro, and lime juice can be served on the side or as a topping.
- Cucumber and Tomato Salad: A light and refreshing cucumber and tomato salad with a vinaigrette is a great complement to the crispy tacos.
**4. Sauces and Condiments:
- Hot Sauce: Offer a variety of hot sauces for guests to customize the spice level of their tacos.
- Salsa Verde: A tangy salsa verde made with tomatillos adds a fresh and zesty flavor.
**5. Beverages:
- Margaritas: Classic lime margaritas or fruit-flavored variations make for a festive drink option.
- Iced Teas: Refreshing iced tea with a hint of lemon or mint complements the meal well.
- Mocktails: Non-alcoholic options like a fruity mocktail or a sparkling limeade add a fun touch.
**6. Garnishes:
- Lime Wedges: Serve lime wedges on the side for a zesty squeeze over the tacos.
- Chopped Cilantro: Fresh cilantro adds a burst of herbal flavor and a pop of color.
**7. Additional Toppings:
- Pickled Jalapeños: Add pickled jalapeños for a tangy and spicy kick.
- Shredded Lettuce: Extra shredded lettuce can be served on the side for those who like additional crunch.
**8. Presentation:
- Taco Bar: Set up a taco bar with all the toppings and ingredients laid out so guests can build their own tacos to their liking.
- Platter Arrangement: Arrange the tacos on a large platter with garnishes and sides around them for an attractive and inviting presentation.
**9. Dessert:
- Churros: Finish the meal with a sweet touch by serving churros dusted with cinnamon and sugar.
- Flan: A creamy flan provides a smooth and satisfying dessert option.
**10. Family-Friendly Options:
- Mini Tacos: For kids or smaller appetites, make mini tacos using small taco shells or tortillas.
- DIY Taco Kits: Provide taco kits with all the components separated so everyone can customize their tacos according to their preferences.
FAQs:
**1. Can I use chicken thighs instead of breasts?
- Answer: Yes, you can use chicken thighs. They are juicier and can add more flavor compared to chicken breasts. Just ensure they are cooked to an internal temperature of 165°F (74°C).
**2. Can I make these tacos ahead of time?
- Answer: While the chicken can be breaded and fried ahead of time, it’s best to assemble the tacos right before serving to keep the taco shells crispy. Store the cooked chicken in an airtight container in the refrigerator for up to 2 days and reheat in the oven to maintain crispiness.
**3. How can I make these tacos healthier?
- Answer: To make the tacos healthier, consider baking the breaded chicken instead of frying it. Use whole wheat taco shells or soft tortillas instead of crispy shells, and add more fresh veggies and lean toppings like Greek yogurt instead of sour cream.
**4. Can I freeze the breaded chicken?
- Answer: Yes, you can freeze the breaded chicken before frying. Arrange the breaded chicken pieces on a baking sheet, freeze until solid, and then transfer to a freezer bag or container. When ready to cook, fry from frozen, adding a few extra minutes to the cooking time.
**5. What if I don’t have buttermilk?
- Answer: If you don’t have buttermilk, you can substitute it with milk mixed with a tablespoon of lemon juice or white vinegar. Let it sit for about 5 minutes to thicken before using.

