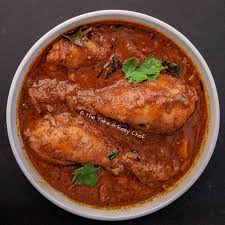
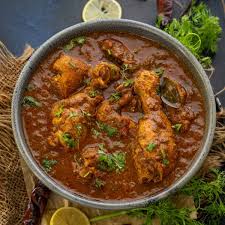
Chettinad Chicken Curry Recipe
Chettinad Chicken Curry Recipe

Chettinad Chicken Curry Recipe Introduction:
Chettinad Chicken Curry is a renowned and flavorful dish hailing from the Chettinad region of Tamil Nadu, South India. Known for its bold and aromatic spices, this curry exemplifies the rich culinary heritage of the Chettinad community.
The hallmark of Chettinad Chicken Curry is its complex blend of spices, which typically includes a mix of roasted coriander seeds, black pepper, fennel seeds, and dried red chilies. This spice mixture is ground into a coarse paste, giving the curry its distinctive and robust flavor profile. The addition of fresh ingredients like onions, tomatoes, and coconut further enhances the depth of flavor.
Chettinad Chicken Curry is characterized by its rich, spicy, and aromatic sauce, which pairs perfectly with steamed rice, dosa, or Indian bread. It’s a popular choice for festive occasions and special gatherings due to its impressive and satisfying flavor. The cooking method involves marinating the chicken in spices and yogurt, then simmering it with a spice paste and other ingredients, resulting in a dish that is both hearty and tantalizing.

Chettinad Chicken Curry Recipe Ingredients:
For the Spice Paste:
- 2 tablespoons coriander seeds
- 1 tablespoon black peppercorns
- 1 teaspoon fennel seeds
- 2-3 dried red chilies (adjust based on your spice preference)
- 1 teaspoon cumin seeds
- 1 tablespoon poppy seeds (optional, for additional richness)
- 1/4 cup grated coconut (fresh or dried)
For the Curry:
- 1 kg chicken pieces (bone-in or boneless, cut into chunks)
- 2 large onions, finely chopped
- 2 tomatoes, finely chopped
- 1/4 cup plain yogurt (for marinating)
- 2 tablespoons ginger-garlic paste
- 2 tablespoons oil (coconut oil or any neutral oil)
- 1 teaspoon turmeric powder
- 1 teaspoon red chili powder (adjust to taste)
- 1 teaspoon garam masala
- 1 teaspoon mustard seeds
- 1 sprig curry leaves
- Salt to taste
- Fresh coriander leaves (for garnish)
- 1 cup water (adjust based on desired consistency)
Optional:
- 1/4 cup chopped cilantro (for additional garnish)
- 1 tablespoon tamarind paste (for a tangy flavor, adjust to taste)
Notes:
- Chicken: You can use bone-in chicken pieces for more flavor, or boneless chicken for a quicker cooking time.
- Coconut: Fresh grated coconut is preferred, but dried coconut can be used if fresh is not available.
- Spice Paste: The spice paste can be made ahead of time and stored in the refrigerator for convenience.
These ingredients come together to create a rich, aromatic, and spicy Chettinad Chicken Curry that showcases the traditional flavors of South Indian cuisine.
Chettinad Chicken Curry Recipe Ingredient Tips:
1. Chicken:
- Bone-In vs. Boneless: Bone-in chicken adds more flavor to the curry due to the marrow and connective tissue, while boneless chicken cooks faster and is easier to eat. Choose based on your preference and cooking time.
- Marinate Well: Marinate the chicken in yogurt and spices for at least 30 minutes to tenderize the meat and infuse it with flavor.
2. Spice Paste:
- Roasting Spices: Lightly roast the coriander seeds, black peppercorns, fennel seeds, cumin seeds, and dried red chilies before grinding to enhance their flavors and release essential oils.
- Grind Fresh: For the best flavor, grind the spices fresh just before using. Pre-ground spices can be used but may not offer the same depth of flavor.
- Adjust Spice Levels: Adjust the quantity of red chilies and black pepper based on your heat tolerance. You can use fewer chilies or milder varieties if you prefer less spice.
3. Coconut:
- Fresh vs. Dried: Fresh grated coconut provides a richer taste and creamier texture. If using dried coconut, soak it in warm water before grinding to achieve a similar consistency.
- Grind Fine: Ensure the coconut is ground finely to blend smoothly into the curry and create a thick, rich sauce.
4. Onions:
- Caramelization: Cook the onions until they are golden brown to develop a sweet, rich flavor that forms the base of the curry.
- Avoid Burning: Stir frequently to prevent the onions from burning, as burnt onions can impart a bitter taste.
5. Tomatoes:
- Ripeness: Use ripe, juicy tomatoes for a balanced acidity and natural sweetness in the curry.
- Cook Well: Ensure the tomatoes are cooked down to a paste to enhance the sauce’s flavor and consistency.
6. Yogurt:
- Use Plain Yogurt: Use plain, unsweetened yogurt for marinating. Avoid flavored or Greek yogurt as it can alter the taste and texture of the curry.
- Add Gradually: If adding yogurt directly to the curry, do so gradually to prevent curdling. Lower the heat before adding yogurt and stir continuously.
7. Spices:
- Adjust Spices: Adjust the quantity of turmeric, red chili powder, and garam masala to taste. Start with smaller amounts and add more if needed to suit your flavor preferences.
- Freshness: Ensure spices are fresh for the best flavor. Store spices in a cool, dark place to maintain their potency.
8. Curry Leaves:
- Freshness: Use fresh curry leaves for the most aromatic flavor. Dried curry leaves can be used as a substitute but may not be as fragrant.
- Add Early: Add curry leaves early in the cooking process to release their flavor into the curry.
9. Water:
- Adjust Consistency: Adjust the amount of water based on your preferred curry consistency. Less water will result in a thicker curry, while more water will make it more soupy.
- Simmer Well: Allow the curry to simmer well to let the flavors meld and the sauce to thicken.
10. Tamarind Paste (Optional):
- Add Carefully: If using tamarind paste, add it gradually and taste as you go. It adds a tangy flavor, so start with a small amount and adjust according to your taste.
Chettinad Chicken Curry Recipe Equipment Needed:
1. Mixing Bowls:
- Purpose: For marinating the chicken and mixing spices.
- Tip: Use a bowl large enough to coat the chicken pieces thoroughly with the marinade.
2. Spice Grinder or Blender:
- Purpose: To grind whole spices into a fine paste for the curry.
- Tip: A dedicated spice grinder or a high-powered blender works best for grinding spices like coriander seeds, black peppercorns, and fennel seeds.
3. Chopping Board and Knife:
- Purpose: For chopping onions, tomatoes, and other vegetables.
- Tip: Use a sharp knife and a sturdy chopping board to ensure efficient and safe chopping.
4. Heavy-Bottomed Pan or Dutch Oven:
- Purpose: To cook the curry evenly and prevent burning.
- Tip: A heavy-bottomed pan helps distribute heat more evenly, reducing the risk of burning and ensuring the curry cooks thoroughly.
5. Skillet or Pan for Roasting Spices:
- Purpose: To roast spices before grinding them.
- Tip: Use a dry skillet over medium heat to lightly roast the spices until fragrant, stirring frequently to prevent burning.
6. Wooden Spoon or Spatula:
- Purpose: For stirring and mixing ingredients in the pan.
- Tip: A wooden spoon or spatula is gentle on cookware and helps prevent sticking.
7. Measuring Spoons and Cups:
- Purpose: To measure out spices, liquids, and other ingredients accurately.
- Tip: Accurate measurements help maintain the balance of flavors in the curry.
8. Grater (if using fresh coconut):
- Purpose: For grating fresh coconut if not using pre-grated coconut.
- Tip: A fine grater or a food processor with a grating attachment works well for this task.
9. Strainer (if needed):
- Purpose: To strain out any large pieces of spice residue or to drain excess liquid if necessary.
- Tip: Use a fine-mesh strainer for best results.
10. Ladle:
- Purpose: For serving the curry.
- Tip: A ladle helps in portioning out the curry neatly.
11. Cooking Thermometer (optional):
- Purpose: To ensure the chicken is cooked through.
- Tip: A meat thermometer can help check if the chicken has reached a safe internal temperature (165°F or 74°C).
12. Storage Containers:
- Purpose: For storing leftovers.
- Tip: Use airtight containers to keep the curry fresh in the refrigerator for up to 3 days.
Chettinad Chicken Curry Recipe Step-by-Step Instructions:
1. Prepare the Spice Paste:
- Roast Spices:
- Heat a dry skillet over medium heat.
- Add 2 tablespoons coriander seeds, 1 tablespoon black peppercorns, 1 teaspoon fennel seeds, 2-3 dried red chilies, 1 teaspoon cumin seeds, and 1 tablespoon poppy seeds (optional).
- Roast, stirring frequently, until fragrant (about 2-3 minutes). Be careful not to burn them.
- Grind Spices:
- Allow the roasted spices to cool.
- Grind them along with 1/4 cup grated coconut (fresh or dried) to a coarse paste using a spice grinder or blender. Add a small amount of water if needed to aid grinding.
2. Marinate the Chicken:
- Marinate:
- In a large mixing bowl, combine 1 kg chicken pieces with 1/4 cup plain yogurt, 1 teaspoon turmeric powder, 1 teaspoon red chili powder, and salt to taste.
- Mix well and let it marinate for at least 30 minutes to 1 hour.
3. Cook the Curry:
- Heat Oil:
-
- In a heavy-bottomed pan or Dutch oven, heat 2 tablespoons oil (coconut oil or any neutral oil) over medium heat.
- Tempering:
-
- Add 1 teaspoon mustard seeds and let them splutter.
- Add 1 sprig curry leaves and sauté for a few seconds.
- Cook Onions:
-
- Add 2 large onions, finely chopped.
- Sauté until the onions turn golden brown and caramelized, stirring frequently.
- Add Ginger-Garlic Paste:
-
- Add 2 tablespoons ginger-garlic paste.
- Cook for 2-3 minutes until the raw smell disappears.
- Add Tomatoes:
-
- Add 2 tomatoes, finely chopped.
- Cook until the tomatoes break down and the oil starts to separate from the mixture.
- Incorporate Spice Paste:
-
- Add the prepared spice paste to the pan.
- Cook for 5-7 minutes, stirring occasionally, until the raw smell of the spices fades and the oil begins to separate from the masala.
- Add Chicken:
-
- Add the marinated chicken pieces to the pan.
- Stir well to coat the chicken with the spice mixture.
- Simmer:
-
- Add 1 cup water (or more if you prefer a thinner curry).
- Bring to a boil, then reduce heat to low.
- Cover and simmer for 25-30 minutes, or until the chicken is cooked through and tender. Stir occasionally.
- Adjust Seasoning:
-
- Taste and adjust salt or spices as needed.
- Add 1 teaspoon garam masala in the last few minutes of cooking.
4. Garnish and Serve:
- Garnish:
-
- Garnish with fresh coriander leaves.
- Optionally, add 1 tablespoon tamarind paste if you prefer a tangy flavor. Stir and simmer for an additional 5 minutes.
- Serve:
-
- Serve hot with steamed rice, dosa, idiyappam, or Indian bread (like naan or chapati).
Tricks & Tips:
- Consistency: Adjust the amount of water based on your preferred consistency. Add more water if the curry is too thick.
- Cooking Time: Ensure the chicken is fully cooked and tender. You can use a meat thermometer to check if the internal temperature reaches 165°F (74°C).
- Spice Levels: Modify the amount of red chili powder and whole spices based on your spice preference.
Tips and Tricks:
1. Spice Blend:
- Freshness Matters: Use fresh whole spices for the best flavor. Store spices in an airtight container in a cool, dark place to maintain their potency.
- Roasting Spices: Lightly roast spices before grinding to enhance their flavor and aroma. Don’t over-roast, as this can lead to bitterness.
2. Grinding Spices:
- Use a High-Quality Grinder: A good spice grinder or high-powered blender will ensure a fine and even grind of the roasted spices and coconut.
- Adjust Texture: For a more textured curry, grind the spices coarsely. For a smoother sauce, grind them into a finer paste.
3. Marinating Chicken:
- Extended Marination: Marinate the chicken for at least 30 minutes to 1 hour to allow the flavors to penetrate deeply. Overnight marination is even better if time permits.
- Yogurt Consistency: Ensure the yogurt used for marinating is plain and not overly tangy. It should be smooth to coat the chicken well.
4. Cooking Onions:
- Golden Brown: Sauté onions until they turn golden brown to build a rich base flavor. This step adds sweetness and depth to the curry.
- Avoid Burning: Stir onions frequently to prevent them from burning. If they start to stick, add a splash of water or oil.
5. Cooking the Paste:
- Cook Thoroughly: Allow the spice paste to cook until the oil begins to separate. This step is crucial for developing the full flavor profile of the curry.
- Stir Frequently: Keep stirring to avoid the paste sticking to the bottom of the pan and burning.
6. Simmering Chicken:
- Check for Tenderness: Simmer the chicken until it is tender and fully cooked. The cooking time may vary depending on the size of the chicken pieces.
- Adjust Consistency: If the curry becomes too thick, add more water or chicken broth to reach the desired consistency.
7. Balancing Flavors:
- Taste as You Go: Adjust salt, spices, and acidity to balance flavors. Add a bit of sugar if the curry is too tangy or acidic.
- Tamarind Paste: If using tamarind paste, add it gradually and taste frequently. Too much can overpower the dish.
8. Garnishing:
- Fresh Herbs: Garnish with fresh coriander leaves right before serving to add a burst of freshness and color.
- Optional Additions: For extra richness, you can also add a splash of cream or a dollop of yogurt at the end of cooking.
9. Serving Suggestions:
- Accompaniments: Serve Chettinad Chicken Curry with traditional South Indian sides like steamed rice, dosa, idiyappam, or chapati.
- Warm and Fresh: Serve the curry hot for the best taste and aroma. Reheat gently if necessary to avoid overcooking.
10. Storing and Reheating:
- Proper Storage: Store leftovers in an airtight container in the refrigerator for up to 3 days. For longer storage, freeze in an airtight container for up to 1 month.
- Reheat Carefully: Reheat the curry gently to avoid overcooking. Add a little water if the curry thickens too much during reheating.
Serving Suggestions:
**1. Steamed Rice:
- Basmati Rice: The aromatic and fluffy texture of basmati rice complements the spicy curry perfectly.
- Jeera Rice: Cumin-flavored rice adds an extra layer of flavor and pairs well with the richness of the curry.
**2. Indian Bread:
- Naan: Soft, pillowy naan bread is great for scooping up the curry.
- Roti or Chapati: Whole wheat flatbreads that are ideal for enjoying with the curry.
- Paratha: Flaky and buttery parathas provide a delicious contrast to the spicy curry.
**3. Dosa or Idiyappam:
- Dosa: Crisp and savory rice crepes that work well with the rich, spiced curry.
- Idiyappam: Steamed rice noodles that soak up the curry beautifully.
**4. Vegetable Sides:
- Cucumber Raita: A cooling yogurt-based side with cucumber and spices to balance the heat of the curry.
- Kachumber Salad: A fresh, tangy salad made with tomatoes, cucumbers, onions, and a lemon dressing.
**5. Chutneys:
- Coconut Chutney: Mild and creamy, this chutney adds a refreshing touch that complements the spicy curry.
- Mint Chutney: Adds a fresh and slightly spicy contrast to the rich curry.
**6. Accompaniments:
- Papadam: Crispy and crunchy lentil wafers that add texture and a bit of saltiness to the meal.
- Pickles: Indian pickles (achar) like mango or lime pickle can add a tangy and spicy kick.
**7. Garnishes:
- Fresh Coriander: Garnish the curry with fresh coriander leaves for a burst of color and fresh flavor.
- Sliced Onions and Lemon Wedges: Serve with thinly sliced onions and lemon wedges on the side for extra tang and crunch.
**8. Beverages:
- Buttermilk: A cool, tangy drink that helps balance the heat and aids digestion.
- Masala Chai: Spiced tea can be a comforting finish to a hearty meal.
**9. Desserts:
- Gulab Jamun: Sweet, syrup-soaked dough balls that offer a rich and satisfying end to the meal.
- Rasam: For those who enjoy a light, tangy soup, a bowl of rasam can complement the curry as a starter or light side dish.
FAQs:
1. Can I make Chettinad Chicken Curry in advance?
- Answer: Yes, you can make Chettinad Chicken Curry in advance. The flavors actually improve as the curry sits, making it a great dish for meal prepping. Store the curry in an airtight container in the refrigerator for up to 3 days. For longer storage, you can freeze it in an airtight container for up to 1 month. Reheat thoroughly before serving.
2. Can I use boneless chicken for this recipe?
- Answer: Yes, you can use boneless chicken for Chettinad Chicken Curry. Boneless chicken cooks faster and may be more convenient for some people. However, bone-in chicken adds more flavor to the curry. If using boneless chicken, reduce the cooking time accordingly, and ensure the chicken is cooked through and tender.
3. How can I adjust the spice level of the curry?
- Answer: To adjust the spice level of Chettinad Chicken Curry, you can:
- Reduce the Amount of Red Chilies: Use fewer dried red chilies in the spice paste or adjust the amount of red chili powder.
- Mild Chili Powders: Opt for mild chili powders if you prefer less heat.
- Add Dairy: Adding a bit of cream or yogurt can help mellow the heat if the curry becomes too spicy.
4. What can I use if I don’t have fresh curry leaves?
- Answer: If you don’t have fresh curry leaves, you can use dried curry leaves as a substitute. However, they are less fragrant and may not provide the same depth of flavor. As a last resort, you can omit them, though fresh curry leaves do add an important flavor note to the dish.
5. Can I make the spice paste ahead of time?
- Answer: Yes, you can make the spice paste ahead of time. Prepare the paste and store it in an airtight container in the refrigerator for up to 1 week. For longer storage, you can freeze the paste in an airtight container or freezer bag for up to 3 months. Thaw and use as needed when preparing the curry.


